User
In the Retail Ops environment, a User is a person who is envolved in the lifecycle of a Customer project. He is a potential manipulator of the solution. A User can be assigned an Identity, a role, a profile, and several Stores. In the Retail Ops context, it is linked to one Company and can be assigned several Stores, Projects, Tasks or EMails.
Standard connection
Login
Every user must have a different login, the login should be the user email. The login will not be modifiable after creation and it must be unique to your company. If needed you can use a different email for the password reset feature. The recovery email allows the user to retrieve (on the login page) their password in case they forget it. It should be unique like the login.
Password
The password must be at least 8 character long and contains at least 1 letter and 1 number Changing the password is accessible in this section on the right side of the screen via the "Change password" action.
OpenID connection
Login
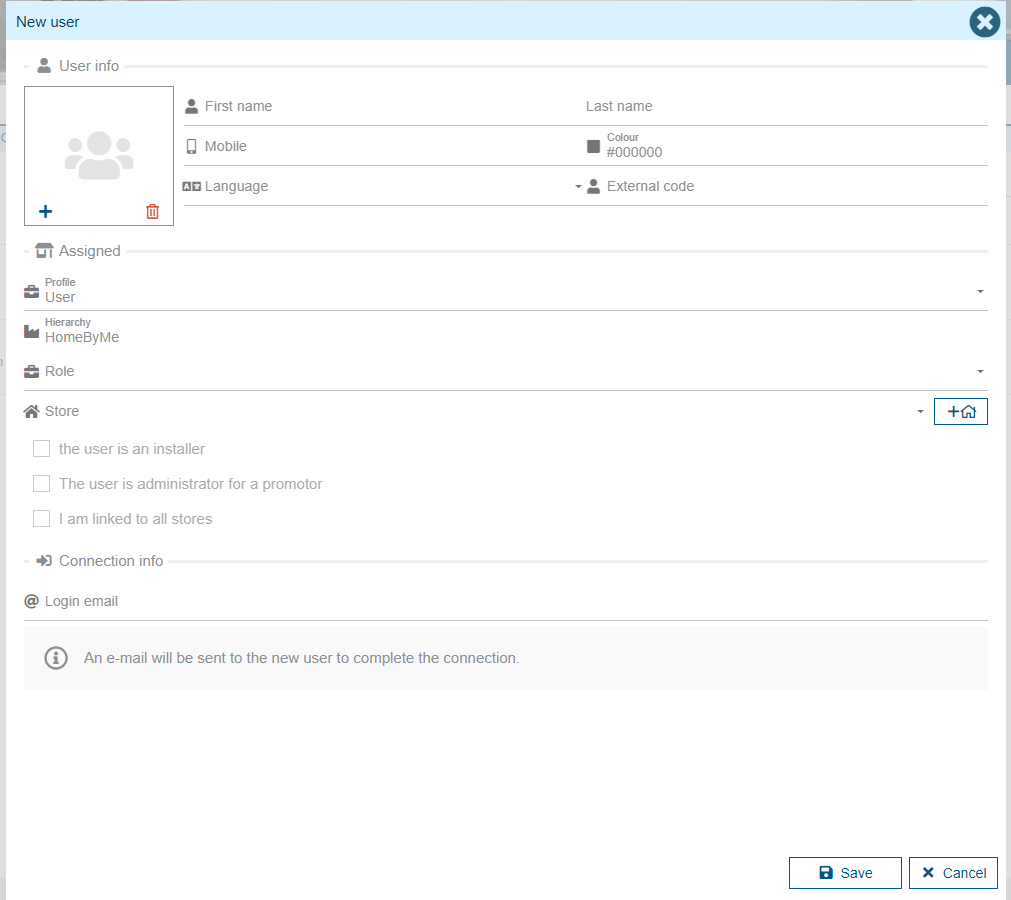
When using OpenID connection you do not manage the login or password in Retail operations, you can only invite user to be linked as a Retail operations user.
An activation email will be sent to the Login email email.
For a Retail operations user, only the last sent activation email link is valid, also, the link is only valid for 1 week.
An OpenID user can only be linked to one Retail operations user. (Disabling a Retail operations user unlinks it from the OpenID)
Other Information
Main information
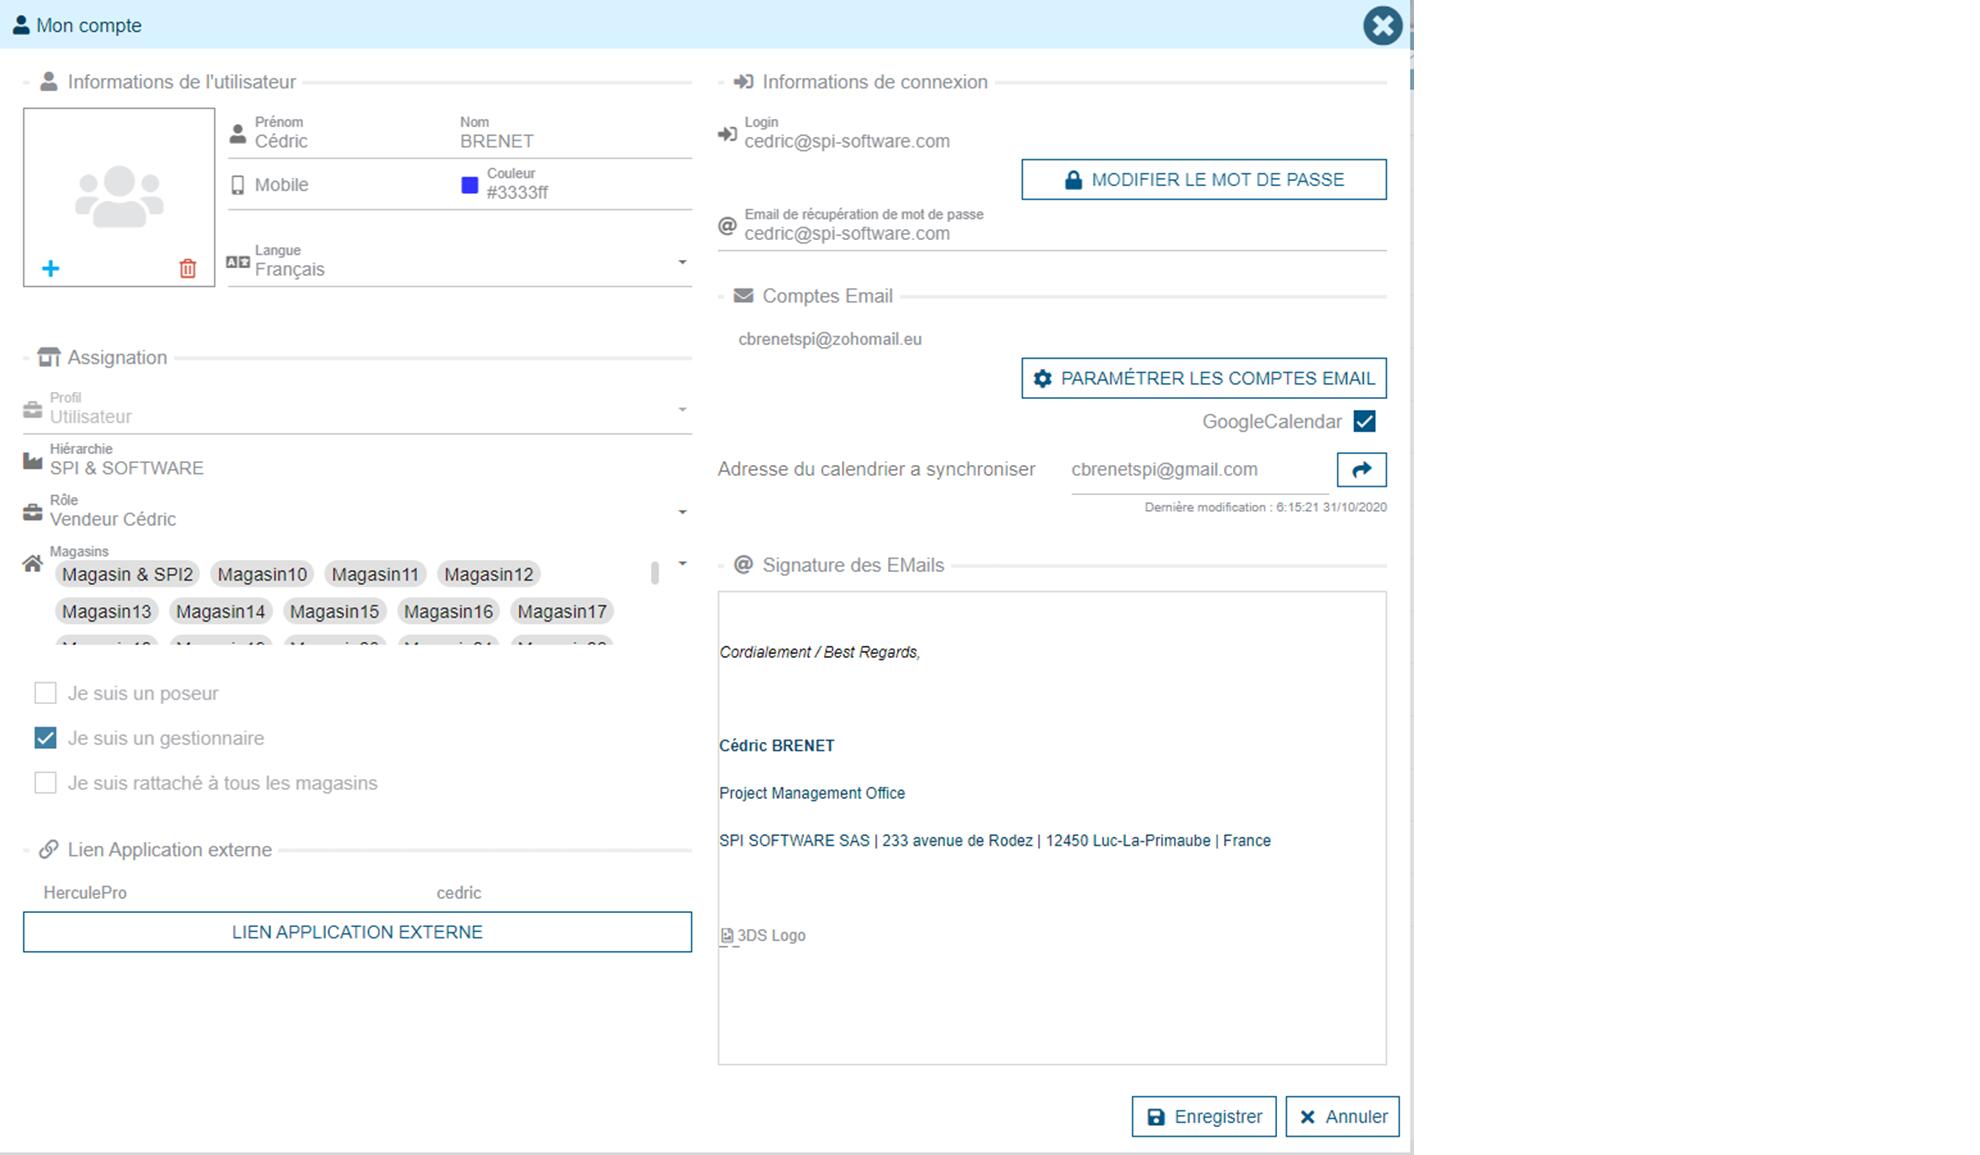
Users can change their contact information: name, first name, phone number. They can also change the color used for calendars and add an image for their user. This image will be visible to other users, particularly in comments exchanged between people.
The following fields will always be editable: image, last name, first name, mobile, color, language, role, list of stores, password, password recovery email, account-related email addresses and email signature.
User role
The role allows you to choose which access right your user will have. Because for each role, you can activate or deactivate certain access to Retail Ops. Example: Your role "User without invoice" will not have the right to create invoices and the second role "User with Invoice" will have the right to create invoices.
User profile
The profile is a field that cannot be changed after creating the user. This allows having more or fewer features in Retail Ops. We have several potential profiles:
- User: standard user
- Central: user who allows tracking of multi-stores
- External: user who allows calling our external APIs
Only users of the "User" profile will be accessible in the lists of filters, resources for creating tasks, etc.
Emails
To set up a user’s email accounts, you must first create it and return to the card for consultation. The email account settings can be found in the “My Account” menu. The possible actions are the same as those seen in the “Email” menu when first used. By accessing “Configure email accounts”, it is possible to add or delete an email account. After clicking on the "Add" button, enter your email address and it will take you to the pages of your email provider to link your email address to Retail Ops.
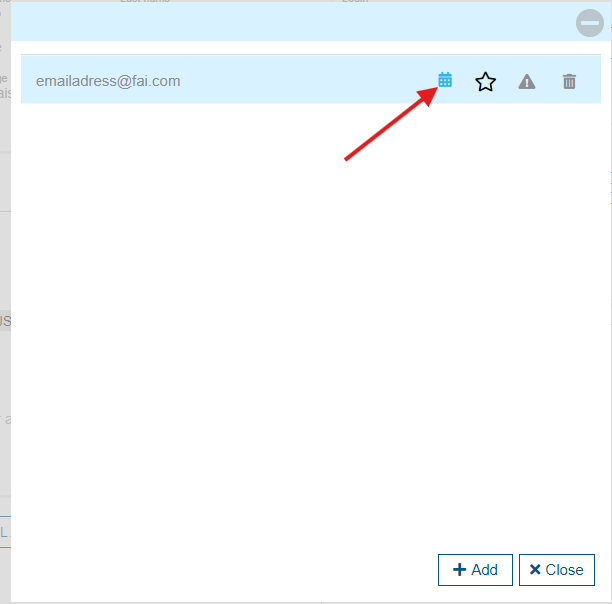
Calendar synchronization
After adding this email address, you will be able to synchronize with the Retail Ops calendar. You will need to click on the calendar icon next to the email address. This will launch the synchronization between your calendar provider (ex: Outlook) and our agenda. This will create a calendar at your provider by taking the email address of your account (password forgotten) and adding -smo at the end (example: email-password-forgot@fai.com-smo). It will be necessary to pay attention to properly use this calendar so that the synchronization works in both directions.
During this first synchronization, tasks whose start date starts less than 30 days ago and tasks end in less than one year will be retrieved. This may potentially take several minutes.
If you change the email address from a forgotten password (for the calendar name), restart a full synchronization. For this, you need to click twice on the calendar icon in your account. During this synchronization, we will escalate all events from Retail Ops to your supplier. This will take the tasks that have never been synchronized before (even in another calendar) or not modified since the last synchronization. If you want to resynchronize these tasks, you will need to modify the tasks in SMO (modify the description, for example).
For proper use of this synchronization, it is not recommended to share Outlook SMO calendars with each other.
Each time a task is added or a task modified, on one of the two sides (Retail Ops or Supplier Email), you will need to wait a few minutes before it appears on the other calendar.
Email Signature
To set up a user’s email signature, you must first create it and return to the card for consultation. Under the email account settings, we find the signature setting. Once the signature is set, it will be used for all emails sent with Retail operations.
Stores
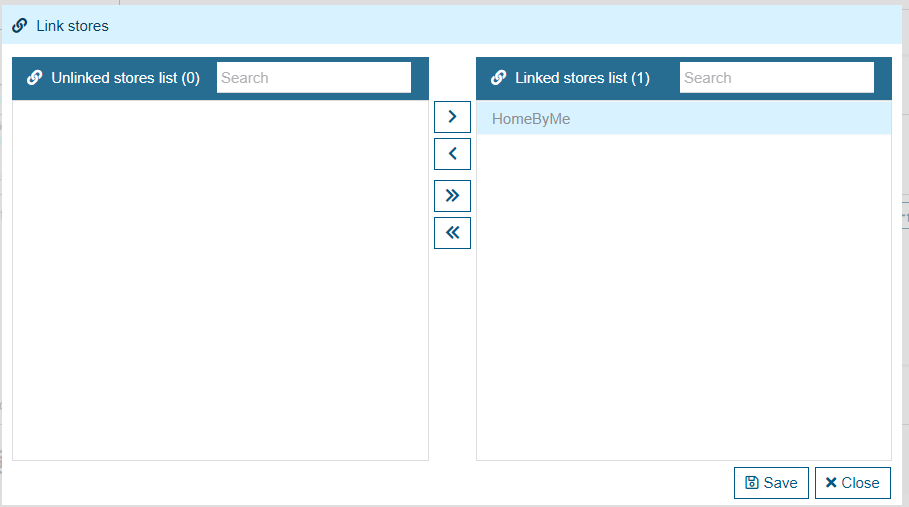
You can also choose which stores you want to link this user to. For this, you will need to use the arrows in the middle to move the stores. On the right side, there will be the stores to which the user is linked and therefore has access. You can use these two pieces of information later to modify the user’s role or to modify their linked stores.